Adding Metadata to Data
CyVerse supports a variety of solutions that allow you to associate your raw data with metadata. Metadata is critically important to quality research (see this article on FAIR Principles), yet it is often an afterthought until you are ready to publish and share. Here are a few metadata features in CyVerse that you should know about and can adopt at the outset.
Some things to remember about the CyVerse Discovery Environment
- You can add metadata to a single file/folder, or in bulk to large collections of data.
- You can use your own metadata schema or apply one of several metadata templates supported in the Discovery Environment.
- Additional templates you may wish to use can be found at resources like https://fairsharing.org/.
- Metadata can be managed through the DE's graphical user interface or by using iCommands at the command line.
- This guide only covers metadata options in the Discovery Environment.
Viewing and Editing Metadata for a Single File/Folder in the Discovery Environment
Note
You must have write or own permission to edit an object's metadata.
- Log into the Discovery Environment.
- Click on the
 (Data Icon) to view or browse data. Select (checkbox) a single file/folder for which you want to add metadata.
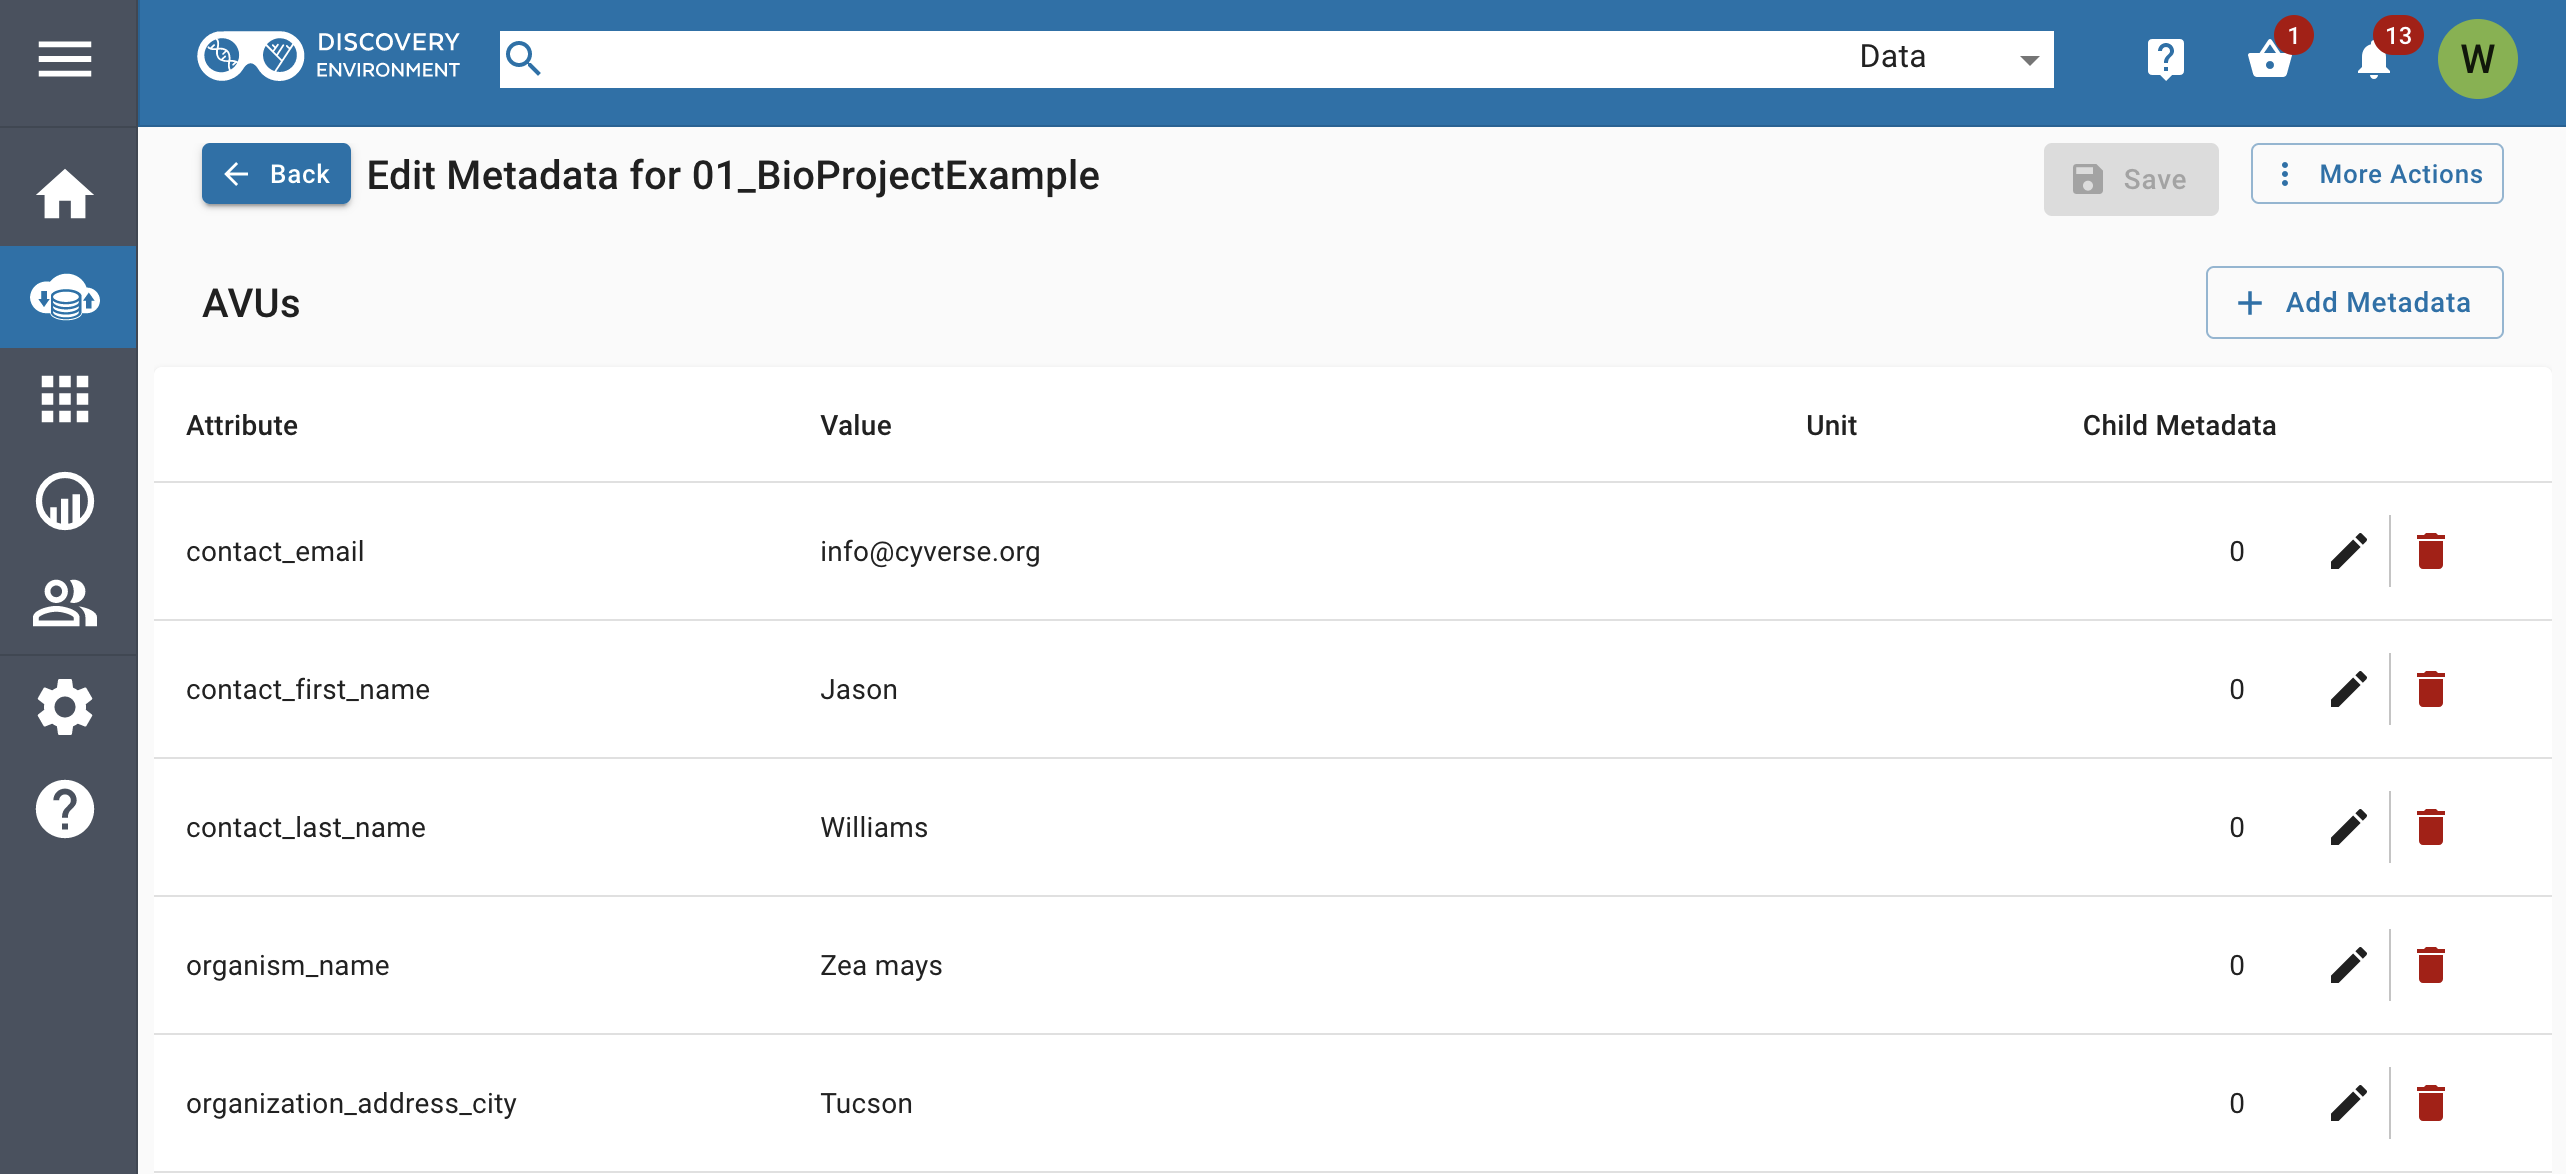
 - Under the More Actions menu, click on 'Metadata'. You will see existing metadata for the file/folder in the Attribute, Value, Unit (AVU) format.
Tip
A single piece of metadata, or an AVU, comprises an attribute, value, and unit. An attribute is a changeable property or characteristic of the file or folder you have selected that can be set to a value. For example, "time point" might be an attribute of a file, while '7' could be its value, and "hour" a unit of the time point.
Adding metadata
- Click the "+ Add Metadata" button to add a new entry. Then follow the directions for editing metadata below.
Editing or deleting metadata
- You may use the "pencil" icon to edit an existing entry or the "trash can" icon to delete an entry.
- After you have made edits or deletions, click 'Save' to save all entries and apply the metadata.
Adding Metadata to Multiple Files/Folders in the Discovery Environment
Adding Metadata using a CyVerse Template
-
Log into the Discovery Environment.
-
Click on the
(Data Icon) to open a Data window. Select (checkbox) a single file/folder to which you want to add metadata. -
Under the More Actions menu, click on Metadata. Click on the subsequent More Actions menu and select View in Template. You have two choices in using the template:
A. Choose a template; clicking Select will allow you to apply the template and edit the metadata manually in the DE interface.
B. Clicking the (Download icon) will download a .csv file you can edit and upload (see Applying bulk metadata below).
Click OK to download. (In this example, we will use the DOI Request - DataCite Metadata) template.
Editing a metadata template in the DE
Follow the steps in the "Editing or deleting metadata" from the section above.
Editing a downloaded metadata template
- Unzip the downloaded template; it will contain two files: blank.csv and guide.csv. Open these files using the spreadsheet editor of your choice.
Tip
-   *blank.csv* is the metadata template that you will complete for your data.
-   *guide.csv* contains instructions for your template, and will usually
     include controlled vocabulary terms for metadata descriptors.
-
Edit the template in one of two ways:
-
If all data will be in a single folder:
-
In the blank.csv spreadsheet, in the 'file name or path' column, enter the file names of all the files in that folder you wish to annotate with metadata.
-
Tip
1.  In any data window, click the '⋮' (3-dots or ellipsis menu) next to any file or folder;
    choose 'copy path' to get the path to that item in the Data Store.
2.  In the remaining columns of the template, enter the values for
    each file/attribute combination that applies.
3.  If desired, add additional columns to the end of the template.
    The metadata in the additional columns will be saved in the
    Data Store but will not be stored as part of the template.
4.  Save the file in CSV format (i.e., [filename].csv). Avoid using spaces or specal characters
    when naming the file or parent folder. You may name this metadata file anything you wish,
    but keep it in CSV format.
-
If data will be in multiple folders:
-
In the blank.csv spreadsheet, in the 'filename or path column, enter the full path of the top-level folder (e.g.,
/iplant/home/YOURUSERNAME/FOLDERNAME) 1. In the remaining columns in the first row, enter the values for each file/attribute combination. 2. Repeat for each file, making sure to add the full file path (e.g.,/iplant/home/YOURUSERNAME/FOLDERNAME) for each file. 3. If desired, add additional columns to the end of the template. The metadata in the columns will be saved in the Data Store but will not be stored as part of the template. 4. Save the file in CSV format (i.e., [filename].csv). Avoid using spaces or specal characters when naming the file or parent folder. You may name this metadata file anything you wish, but keep it in CSV format. -
In an open 'Data' window in the Discovery Environment, navigate to the appropriate location for uploading the template:
-
If the first column of your metadata file contains only file names (i.e., all data files are in the same folder), navigate to the folder and use the Upload button (Browse local) or your choice of upload tool to upload the metadata (csv file) to that folder.
-
If the first column of your metadata file contains the full path to each file (i.e., the data files are in different folders), it does not matter where the metadata file is located on the Data Store. Use the Upload button (Browse local) or your choice of upload tool to upload the metadata (csv file) to an appropriate location on the Data Store.
Tip
For convenient management and editing, use absolute file paths (e.g.,
/iplant/home/your_file_location) so that all of your metadata spreadsheets will be in one location on the Data Store.
-
-
To apply the metadata, select (checkbox) in the Data window the name of the folder containing the data files to which you want to apply the metadata in bulk.
- Click the More Actions menu, select 'Apply Bulk Metadata'; browse to the uploaded metadata spreadsheet and select it.
Your metadata should now be applied to your files. You should receive a notification (bell icon) in the Discovery Environment and you can confirm the metadata have been correctly applied by following the steps in the preceding section to view metadata.